Tutorial Cypress API Token
Halo semuanya, aku kembali lagi dengan tutorial baru dengan bahasa Indonesia. Kenapa memilih judul ini? Karena belum ada judul tersebut yang menggunakan tutorial bahasa Indonesia. Tapi di artikel ini belum sempurna dan masih ada redundant code. Kenapa nulis artikel? Karena sebagai pengingat pribadi aja & berbagi sedikit ilmu. Tutorial ini menggunakan sistem operasi windows & public api https://practice.expandtesting.com/notes/api/api-docs/#/Users. Okay, langsung aja yaa..
- Buka text editor
- Klik File, Klik Open Folder
- Pilih di folder mana akan menyimpan folder, lalu klik new folder, rename folder, dan klik open folder
- Buka terminal d itext editor (ctrl + ‘)
- Generate file package.json
npm init -y6. Install cypress
npm install cypress --save-dev7. Generate folder cypress
npx cypress open8. Lalu muncul popup, klik E2E Testing

7. Selanjutnya klik continue

8. Pilih browser (aku pilih Electron karena lebih cepat run test cases) lalu klik Start E2E Testing in Electron

9. Klik scaffold example specs

10. Klik Okay, I got it!

11. File .cy.js auto generate setiap kali install cypress dan klik icon close browser

12. Kembali Terminal Text Editor, karena kita akan menggunakan faker untuk generate random data, maka install faker dulu
npm install @faker-js/faker --save-dev13. Install cypress-mochawesome-reporter untuk generate report
npm install cypress-mochawesome-reporter --save-dev14. Sebelum mulai coding, kita hapus dulu folder yang tidak diperlukan, terdapat di cypress > e2e > 2-advanced-examples
15. Buat file baru api.cy.js di folder 1-getting-started, terdapat di cypress > e2e
Kita akan automate 10 endpoint, dan terdapat 9 test cases yaitu
1. success register
2. success login & get profile
3. success login & update profile
4. success forgot password
5. failed verify reset password token because token invalid (no authorize)
6. failed reset password because token invalid (no authorize)
7. failed change password because token invalid (no authorize)
8. success login & logout
9. failed delete account because token invalid (no authorize)
Skenario 1 : success register
it("success register", () => {
  const name_faker = faker.person.fullName();
  const email_faker = faker.internet.email();
  const pass_faker = faker.internet.password({ length: 6 });
  cy.request({
    method: "POST",
    url: "https://practice.expandtesting.com/notes/api/users/register",
    headers: {
      "Content-Type": "application/x-www-form-urlencoded",
      "accept" : "application/json",
    },
    body: {
      name: name_faker,
      email: email_faker,
      password: pass_faker,
    },
  }).then((response) => {
    expect(response.status).to.eq(201);
    expect(response.body["message"]).to.eq("User account created successfully");
  });
});
Di skenario 1 test positif, bisa menggunakan faker untuk data register. Pada data password terdapat validasi harus terdiri dari 6 karakter, sehingga dibatasi length 6 atau jumlah karakter 6. Pada response menvalidasi bahwa status nya 201 & terdapat message “User account created successfully” pada response body.
Scenario 2: success login & get profile
it("success login & get profile", () => {
  cy.request({
    method: "POST",
    url: "https://practice.expandtesting.com/notes/api/users/login",
    headers: {
      "Content-Type": "application/x-www-form-urlencoded",
      "accept": "application/json",
    },
    body: {
      email: "zoro@mail.com",
      password: "123456",
    },
  })
    .then((response) => {
      expect(response.status).to.eq(200);
      expect(response.body["message"]).to.eq("Login successful");
      const token = response.body["data"]["token"];
      return token;
    })
    .then((token) => {
      cy.request({
        method: "GET",
        url: "https://practice.expandtesting.com/notes/api/users/profile",
        headers: {
          "Content-Type": "application/x-www-form-urlencoded",
          "accept": "application/json",
          "x-auth-token": token,
        },
      }).then((response) => {
        expect(response.status).to.eq(200);
        expect(response.body["message"]).to.eq("Profile successful");
      });
    });
});
Di skenario 2 test positif, tidak bisa menggunakan faker untuk data login karena terdapat validasi hanya user yang sudah pernah register saja yang dapat login. Pada skenario ini terdapat 2 endpoint karena keduanya terdapat proses yang berkesinambungan yaitu respon token dari endpoint login digunakan untuk headers endpoint get profile. Pada response kedua endpoint menvalidasi bahwa status nya 200, terdapat message “Login successful” untuk endpoint 1 pada response body dan message “Profile successful” untuk endpoint 2 pada response body.
Skenario 3 : success login & update profile
it("success login & update profile", () => {
  cy.request({
    method: "POST",
    url: "https://practice.expandtesting.com/notes/api/users/login",
    headers: {
      "Content-Type": "application/x-www-form-urlencoded",
      "accept": "application/json",
    },
    body: {
      email: "zoro@mail.com",
      password: "123456",
    },
  })
    .then((response) => {
      expect(response.status).to.eq(200);
      expect(response.body["message"]).to.eq("Login successful");
      const token = response.body["data"]["token"];
      return token;
    })
    .then((token) => {
      cy.request({
        method: "PATCH",
        url: "https://practice.expandtesting.com/notes/api/users/profile",
        headers: {
          "Content-Type": "application/x-www-form-urlencoded",
          "accept": "application/json",
          "x-auth-token": token,
        },
        body: {
          name: "zoro",
        },
      }).then((response) => {
        expect(response.status).to.eq(200);
        expect(response.body["message"]).to.eq("Profile updated successful");
      });
    });
});
Di skenario 3 test positif, tidak bisa menggunakan faker untuk data login karena terdapat validasi hanya user yang sudah pernah register saja yang dapat login. Pada skenario ini terdapat 2 endpoint karena keduanya terdapat proses yang berkesinambungan yaitu respon token dari endpoint login digunakan untuk headers endpoint update profile. Pada response kedua endpoint menvalidasi bahwa status nya 200, terdapat message “Login successful” untuk endpoint 1 pada response body dan message “Profile updated successful” untuk endpoint 2 pada response body.
Skenario 4 : success forgot password
it("success forgot password", () => {
  const email_forgot_password = "manda@yopmail.com";
  cy.request({
    method: "POST",
    url: "https://practice.expandtesting.com/notes/api/users/forgot-password",
    headers: {
      "Content-Type": "application/x-www-form-urlencoded",
      "accept": "application/json",
    },
    body: {
      "email": email_forgot_password,
    },
  }).then((response) => {
    expect(response.status).to.eq(200);
    expect(response.body["message"]).to.eq(
      "Password reset link successfully sent to manda@yopmail.com. Please verify by clicking on the given link"
    );
  });
});
Di skenario 4 test positif, tidak bisa menggunakan faker untuk data email, karena response message terdapat data email. Pada response menvalidasi bahwa status nya 200 & terdapat message “Password reset link successfully sent to manda@yopmail.com. Please verify by clicking on the given link”.
Skenario 5 : failed verify reset password token because token invalid (no authorize)
it("failed verify reset password token because token invalid (no authorize)", () => {
  const token_faker = faker.string.alphanumeric({ length: 64 });
  cy.request({
    method: "POST",
    url: "https://practice.expandtesting.com/notes/api/users/verify-reset-password-token",
    headers: {
      "Content-Type": "application/x-www-form-urlencoded",
      "accept": "application/json",
    },
    body: {
      token: token_faker,
    },
    failOnStatusCode: false,
  }).then((response) => {
    expect(response.status).to.eq(401);
    expect(response.body["message"]).to.eq(
      "The provided password reset token is invalid or has expired"
    );
  });
});
Di skenario 5 test negatif karena tidak menggunakan data token asli, bisa menggunakan faker untuk data token. Menggunakan token faker karena data token asli tidak masuk ke email. Pada response endpoint menvalidasi bahwa status nya 401, terdapat message “The provided password reset token is invalid or has expired” .
Skenario 6 : failed reset password because token invalid (no authorize)
it("failed reset password because token invalid (no authorize)", () => {
  const token_faker = faker.string.alphanumeric({ length: 64 });
  const pass_faker = faker.internet.password({ length: 6 });
  cy.request({
    method: "POST",
    url: "https://practice.expandtesting.com/notes/api/users/reset-password",
    headers: {
      "Content-Type": "application/x-www-form-urlencoded",
      "accept": "application/json",
    },
    body: {
      token: token_faker,
      newPassword : pass_faker
    },
    failOnStatusCode: false,
  }).then((response) => {
    expect(response.status).to.eq(401);
    expect(response.body["message"]).to.eq(
        "The password reset token is invalid or has expired"
      );
  });
});
Di skenario 6 test negatif karena tidak menggunakan data token asli, bisa menggunakan faker untuk data token. Menggunakan token faker karena data token asli tidak masuk ke email. Pada response endpoint menvalidasi bahwa status nya 401, terdapat message “The password reset token is invalid or has expired” .
Skenario 7 : failed change password because token invalid (no authorize)
it("failed change password because token invalid (no authorize)", () => {
  const token_faker = faker.string.alphanumeric({ length: 64 });
  const pass_faker = faker.internet.password({ length: 6 });
  cy.request({
    method: "POST",
    url: "https://practice.expandtesting.com/notes/api/users/change-password",
    headers: {
      "Content-Type": "application/x-www-form-urlencoded",
      "accept" : "application/json",
      "x-auth-token" : token_faker,
    },
    body: {
      old_password: pass_faker,
      new_password: pass_faker,
    },
    failOnStatusCode: false,
  }).then((response) => {
    expect(response.status).to.eq(401);
    expect(response.body["message"]).to.eq(
        "Access token is not valid or has expired, you will need to login"
      );
  });
});
Di skenario 7 test negatif karena tidak menggunakan data token asli, bisa menggunakan faker untuk data token. Menggunakan token faker karena data token asli tidak masuk ke email. Pada response endpoint menvalidasi bahwa status nya 401, terdapat message “Access token is not valid or has expired, you will need to login” .
Skenario 8 : success login & logout
it("success login & logout", () => {
  cy.request({
    method: "POST",
    url: "https://practice.expandtesting.com/notes/api/users/login",
    headers: {
      "Content-Type": "application/x-www-form-urlencoded",
      "accept": "application/json",
    },
    body: {
      email: "zoro@mail.com",
      password: "123456",
    },
  })
    .then((response) => {
      expect(response.status).to.eq(200);
      expect(response.body["message"]).to.eq("Login successful");
      const token = response.body["data"]["token"];
      return token;
    })
    .then((token) => {
  cy.request({
    method: "DELETE",
    url: "https://practice.expandtesting.com/notes/api/users/logout",
    headers: {
      "accept" : "application/json",
      "x-auth-token" : token,
    },
    failOnStatusCode: false,
  }).then((response) => {
    expect(response.status).to.eq(200);
    expect(response.body["message"]).to.eq(
        "User has been successfully logged out"
      );
  });
});
});
Di skenario 2 test positif, tidak bisa menggunakan faker untuk data login karena terdapat validasi hanya user yang sudah pernah register saja yang dapat login & logout. Pada response menvalidasi bahwa status nya 200, terdapat message “User has been successfully logged out”.
Skenario 9 : failed delete account because token invalid (no authorize)
it("failed delete account because token invalid (no authorize)", () => {
  const token_faker = faker.string.alphanumeric({ length: 64 });
  cy.request({
    method: "DELETE",
    url: "https://practice.expandtesting.com/notes/api/users/delete-account",
    headers: {
      "accept" : "application/json",
      "x-auth-token" : token_faker,
    },
    failOnStatusCode: false,
  }).then((response) => {
    expect(response.status).to.eq(401);
    expect(response.body["message"]).to.eq(
        "Access token is not valid or has expired, you will need to login"
      );
  });
});
Di skenario 9 test negatif karena tidak menggunakan data token asli, karena jika token asli data usernya terhapus. Sebagai penggantinya bisa menggunakan faker untuk data token. Pada response endpoint menvalidasi bahwa status nya 401, terdapat message “Access token is not valid or has expired, you will need to login” .
Berikut code lengkap dari api.cy.js
import { faker } from "@faker-js/faker";

it("success register", () => {
  const name_faker = faker.person.fullName();
  const email_faker = faker.internet.email();
  const pass_faker = faker.internet.password({ length: 6 });
  cy.request({
    method: "POST",
    url: "https://practice.expandtesting.com/notes/api/users/register",
    headers: {
      "Content-Type": "application/x-www-form-urlencoded",
      "accept" : "application/json",
    },
    body: {
      name: name_faker,
      email: email_faker,
      password: pass_faker,
    },
  }).then((response) => {
    expect(response.status).to.eq(201);
    expect(response.body["message"]).to.eq("User account created successfully");
  });
});

it("success login & get profile", () => {
  cy.request({
    method: "POST",
    url: "https://practice.expandtesting.com/notes/api/users/login",
    headers: {
      "Content-Type": "application/x-www-form-urlencoded",
      "accept": "application/json",
    },
    body: {
      email: "zoro@mail.com",
      password: "123456",
    },
  })
    .then((response) => {
      expect(response.status).to.eq(200);
      expect(response.body["message"]).to.eq("Login successful");
      const token = response.body["data"]["token"];
      return token;
    })
    .then((token) => {
      cy.request({
        method: "GET",
        url: "https://practice.expandtesting.com/notes/api/users/profile",
        headers: {
          "Content-Type": "application/x-www-form-urlencoded",
          "accept": "application/json",
          "x-auth-token": token,
        },
      }).then((response) => {
        expect(response.status).to.eq(200);
        expect(response.body["message"]).to.eq("Profile successful");
      });
    });
});

it("success login & update profile", () => {
  cy.request({
    method: "POST",
    url: "https://practice.expandtesting.com/notes/api/users/login",
    headers: {
      "Content-Type": "application/x-www-form-urlencoded",
      "accept": "application/json",
    },
    body: {
      email: "zoro@mail.com",
      password: "123456",
    },
  })
    .then((response) => {
      expect(response.status).to.eq(200);
      expect(response.body["message"]).to.eq("Login successful");
      const token = response.body["data"]["token"];
      return token;
    })
    .then((token) => {
      cy.request({
        method: "PATCH",
        url: "https://practice.expandtesting.com/notes/api/users/profile",
        headers: {
          "Content-Type": "application/x-www-form-urlencoded",
          "accept": "application/json",
          "x-auth-token": token,
        },
        body: {
          name: "zoro",
        },
      }).then((response) => {
        expect(response.status).to.eq(200);
        expect(response.body["message"]).to.eq("Profile updated successful");
      });
    });
});

it("success forgot password", () => {
  const email_forgot_password = "manda@yopmail.com";
  cy.request({
    method: "POST",
    url: "https://practice.expandtesting.com/notes/api/users/forgot-password",
    headers: {
      "Content-Type": "application/x-www-form-urlencoded",
      "accept": "application/json",
    },
    body: {
      "email": email_forgot_password,
    },
  }).then((response) => {
    expect(response.status).to.eq(200);
    expect(response.body["message"]).to.eq(
      "Password reset link successfully sent to manda@yopmail.com. Please verify by clicking on the given link"
    );
  });
});

it("failed verify reset password token because token invalid (no authorize)", () => {
  const token_faker = faker.string.alphanumeric({ length: 64 });
  cy.request({
    method: "POST",
    url: "https://practice.expandtesting.com/notes/api/users/verify-reset-password-token",
    headers: {
      "Content-Type": "application/x-www-form-urlencoded",
      "accept": "application/json",
    },
    body: {
      token: token_faker,
    },
    failOnStatusCode: false,
  }).then((response) => {
    expect(response.status).to.eq(401);
    expect(response.body["message"]).to.eq(
      "The provided password reset token is invalid or has expired"
    );
  });
});

it("failed reset password because token invalid (no authorize)", () => {
  const token_faker = faker.string.alphanumeric({ length: 64 });
  const pass_faker = faker.internet.password({ length: 6 });
  cy.request({
    method: "POST",
    url: "https://practice.expandtesting.com/notes/api/users/reset-password",
    headers: {
      "Content-Type": "application/x-www-form-urlencoded",
      "accept": "application/json",
    },
    body: {
      token: token_faker,
      newPassword : pass_faker
    },
    failOnStatusCode: false,
  }).then((response) => {
    expect(response.status).to.eq(401);
    expect(response.body["message"]).to.eq(
        "The password reset token is invalid or has expired"
      );
  });
});

it("failed change password because token invalid (no authorize)", () => {
  const token_faker = faker.string.alphanumeric({ length: 64 });
  const pass_faker = faker.internet.password({ length: 6 });
  cy.request({
    method: "POST",
    url: "https://practice.expandtesting.com/notes/api/users/change-password",
    headers: {
      "Content-Type": "application/x-www-form-urlencoded",
      "accept" : "application/json",
      "x-auth-token" : token_faker,
    },
    body: {
      old_password: pass_faker,
      new_password: pass_faker,
    },
    failOnStatusCode: false,
  }).then((response) => {
    expect(response.status).to.eq(401);
    expect(response.body["message"]).to.eq(
        "Access token is not valid or has expired, you will need to login"
      );
  });
});

it("success login & logout", () => {
  cy.request({
    method: "POST",
    url: "https://practice.expandtesting.com/notes/api/users/login",
    headers: {
      "Content-Type": "application/x-www-form-urlencoded",
      "accept": "application/json",
    },
    body: {
      email: "zoro@mail.com",
      password: "123456",
    },
  })
    .then((response) => {
      expect(response.status).to.eq(200);
      expect(response.body["message"]).to.eq("Login successful");
      const token = response.body["data"]["token"];
      return token;
    })
    .then((token) => {
  cy.request({
    method: "DELETE",
    url: "https://practice.expandtesting.com/notes/api/users/logout",
    headers: {
      "accept" : "application/json",
      "x-auth-token" : token,
    },
    failOnStatusCode: false,
  }).then((response) => {
    expect(response.status).to.eq(200);
    expect(response.body["message"]).to.eq(
        "User has been successfully logged out"
      );
  });
});
});

it("failed delete account because token invalid (no authorize)", () => {
  const token_faker = faker.string.alphanumeric({ length: 64 });
  cy.request({
    method: "DELETE",
    url: "https://practice.expandtesting.com/notes/api/users/delete-account",
    headers: {
      "accept" : "application/json",
      "x-auth-token" : token_faker,
    },
    failOnStatusCode: false,
  }).then((response) => {
    expect(response.status).to.eq(401);
    expect(response.body["message"]).to.eq(
        "Access token is not valid or has expired, you will need to login"
      );
  });
});
16. Setelah selesai code test cases, update file cypress.config.js
const { defineConfig } = require("cypress");

module.exports = defineConfig({
  e2e: {
    setupNodeEvents(on, config) {
      // implement node event listeners here
    },
  },
  videosFolder: "cypress/reports/videos",
    screenshotsFolder: "cypress/reports/screenshots",
    reporter: 'cypress-mochawesome-reporter',
    reporterOptions: {
        charts: true,
        reportPageTitle: 'report-cypress',
        embeddedScreenshots: true,
        inlineAssets: true,
        saveAllAttempts: false,
    },
});
17. Berikut struktur foldernya
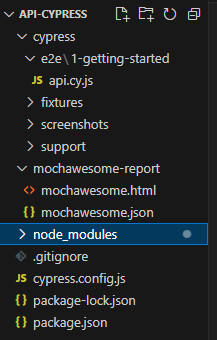
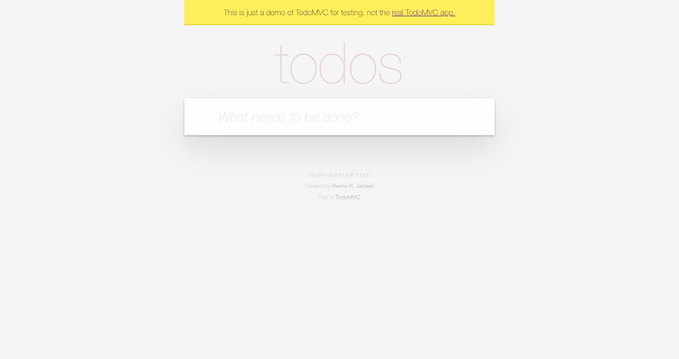
18. Run automation test, ketik di Terminal Text Editor, lalu akan membuka otomatis browser
npx cypress open
23. Ketik di Terminal Text Editor, lalu akan run di terminal, tanpa membuka browser
npx cypress run
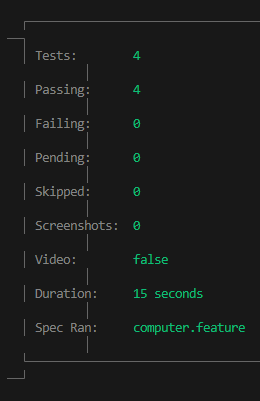
24. Ketik di Terminal Text Editor dan akan mendapatkan report sederhana. Temukan report di folder mochawsome-report. klik kanan file mochawsome.html, klik copy path, paste path di browser lalu enter.
npx cypress run --reporter mochawesome
Sekian tutorial kali ini, semoga membantu dalam belajar automation test. Jika terdapat error & feedback feel free tulis di komentar yaa.